Related articles


Understanding Hubspot transactions

Hubspot introductions
Hubspot is a CRM (Customer Relationship Management) widely used nowadays.
A quick reminder for those who are unaware or have forgotten it, a CRM is a tool that allows a company to follow the activity of its users on its platform andinteract with them in a personalized way.
For example, on this tool we will be able to determine that a user is 80% likely to trigger a sale and we will send him a reminder email if he has not connected to the target page for more than a week.
In this example mentioned above, several concepts are important to understand:
- The”transactions“
- The “workflows”
- API connections
Since these are vast topics, in this article, I suggest that we focus on transactions.
The transactions
A transaction could be summarised as a user's intention to perform an action (generally a purchase or an investment). It includes properties that can be updated in order to make this transaction evolve according to the user's activity on the platform.
These properties are managed from the settings as shown in the screenshot below (Settings > Properties > Create Property):
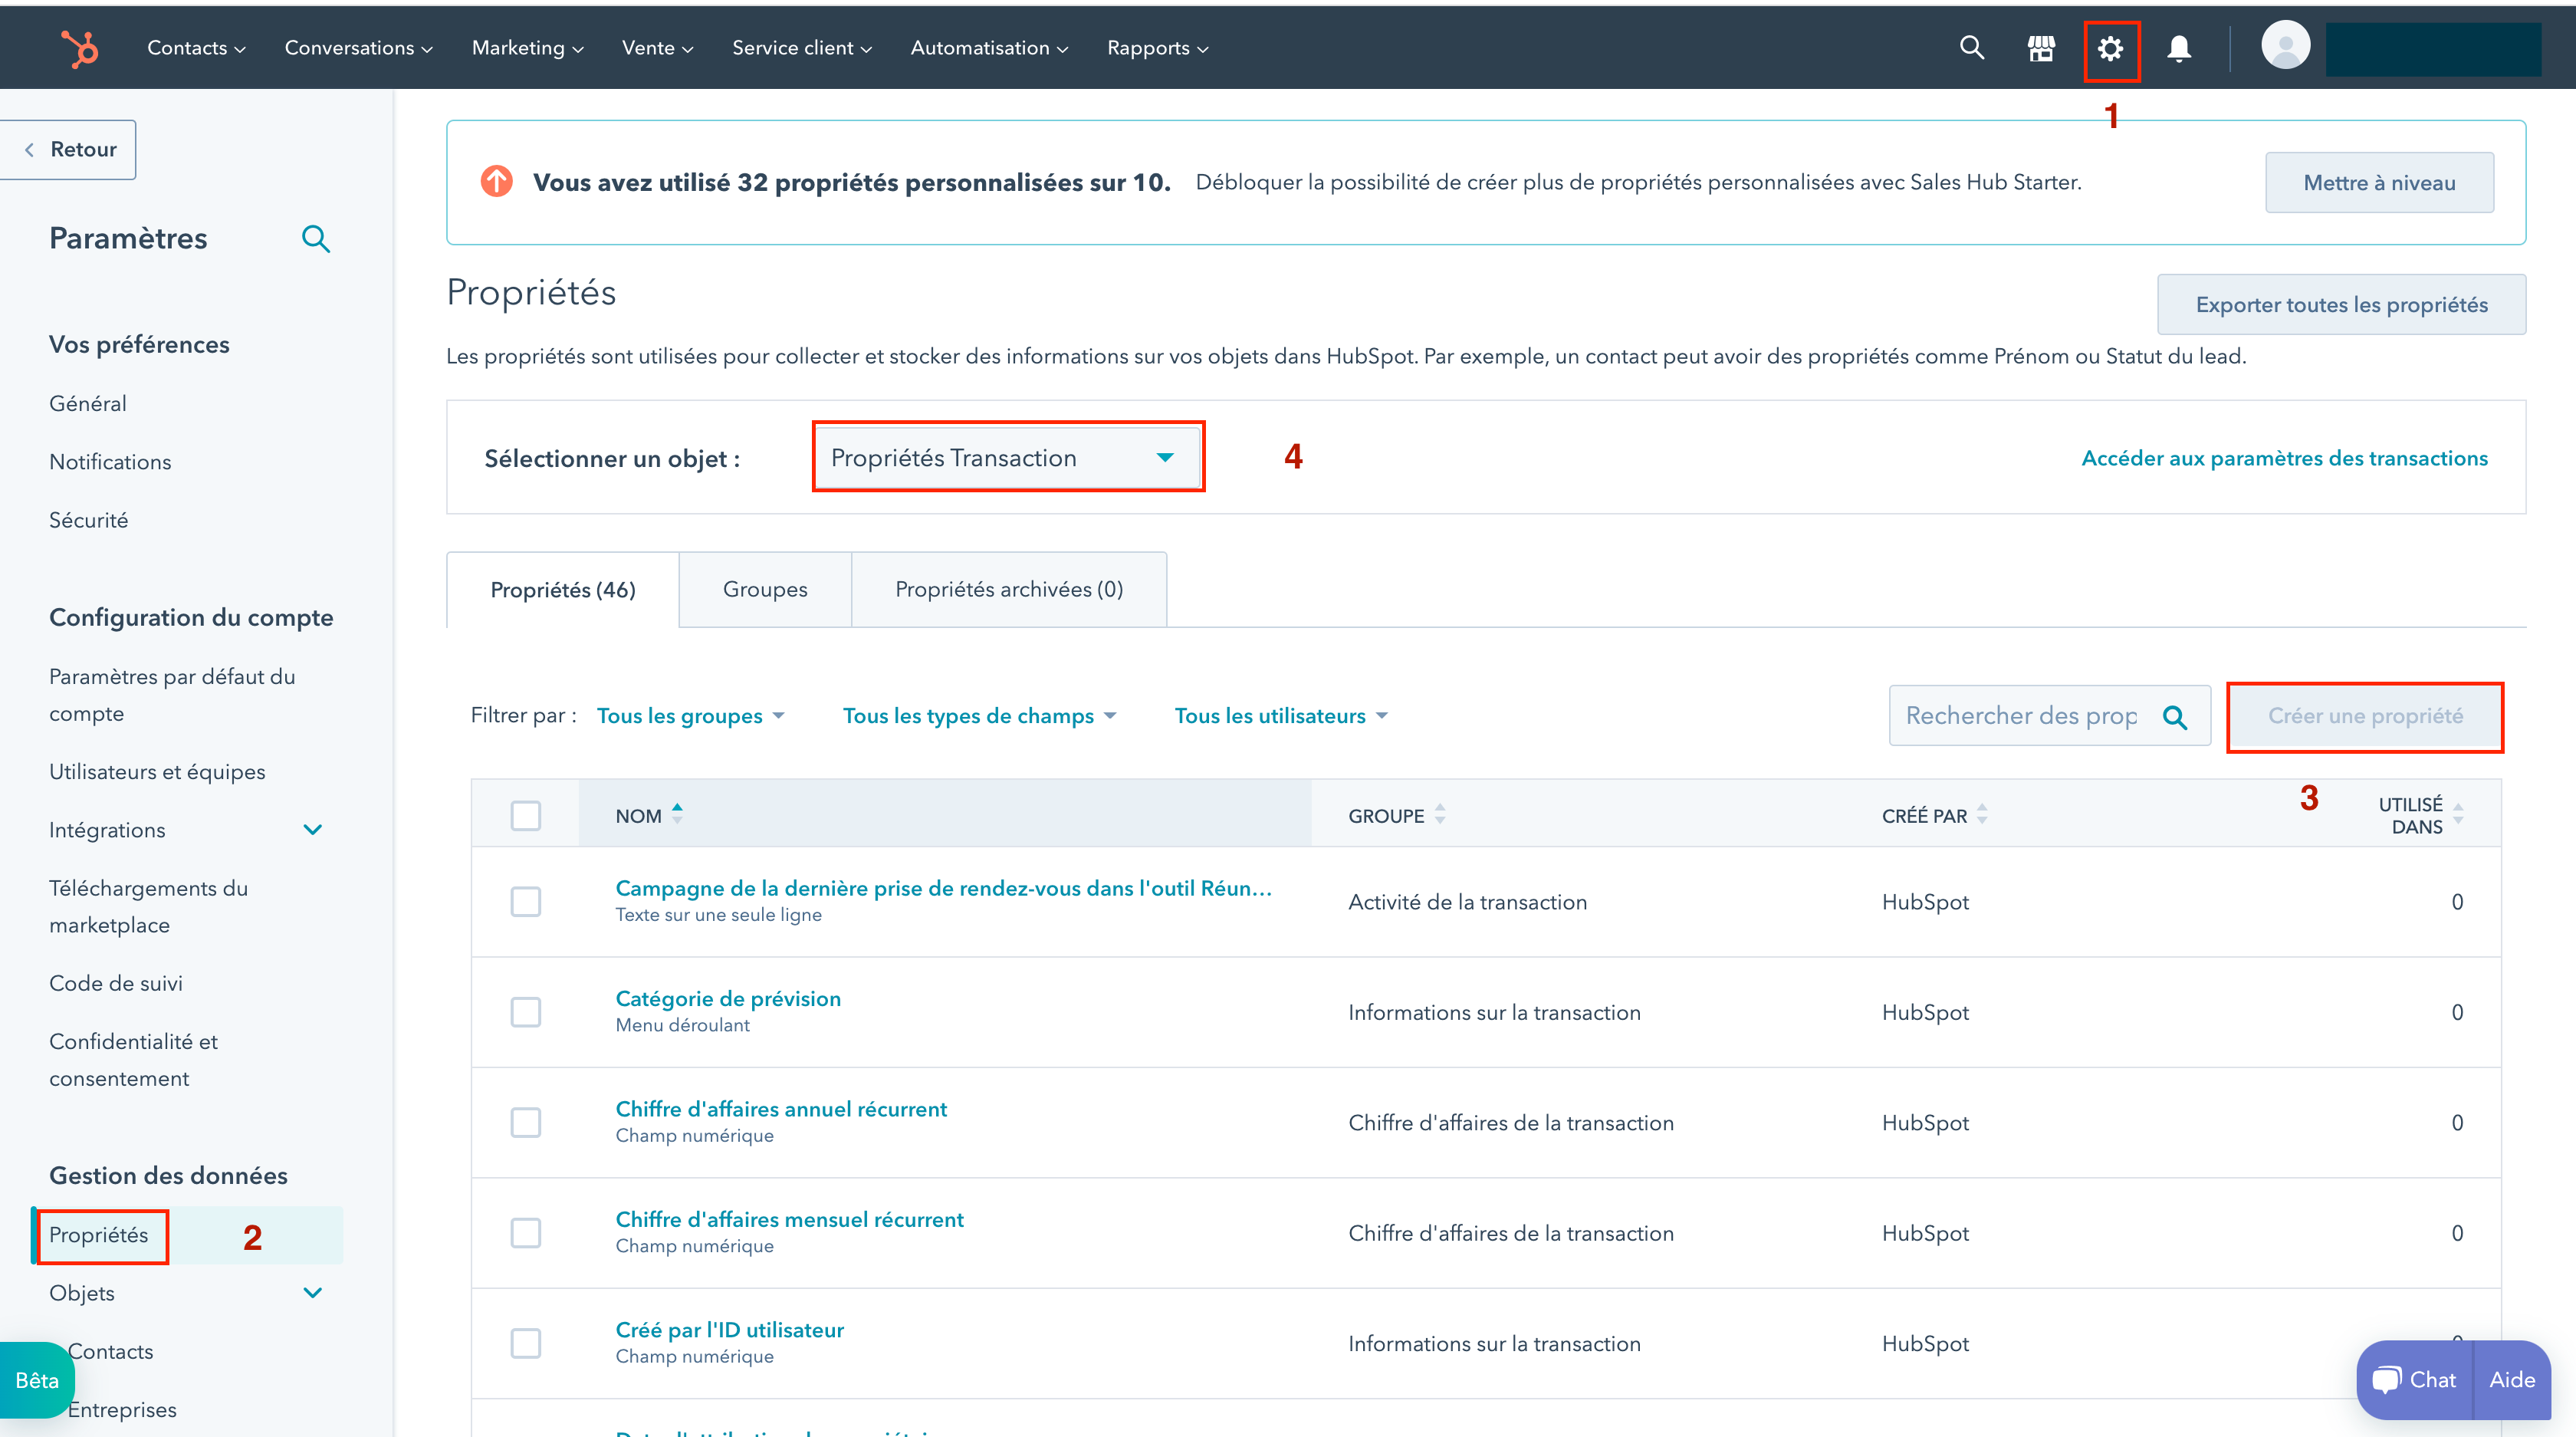
Below is the legend:
- Go to settings
- Select the “Properties” tab
- You can click on “Create a property”
- You can click on “Transaction Properties” to display all the properties that make up the transactions.
Some properties are included by default in all transactions but you can also create your own properties.
When you create one, for example, “Contract signed?” , you will need to indicate its pipeline, its group, as well as its format. In the case of “Contract signed?” , the format would be “Boolean” (either “Yes” or “No”). As for the group, this simply makes it possible to organize transaction properties by “theme”. For example, you could create two groups: “Critical Properties” and “Secondary Properties.” This is done from the “Groups” tab to the right of the “Properties” tab.
When transactions on Hubspot are properly implemented, they allow administrators to have visibility and understanding of user activity on their platform. This allows them, among other things, to know which steps in a process cause the most friction to trigger a sale or to know exactly where each user is in the sales process.
For the rest of this article, I will take the example of an online investment platform.
Configuring pipelines and phases
As you may have noticed, I have mentioned the term” several timesprocess“. This concept is at the heart of how transactions work.
In an investment firm, there may be several very distinct processes, such as the acquisition of new project developers or the investment of a user of the platform. In order not to mix everything up, we will start by separating the company's activity into several processes called”Pipeline“on Hubspot.
So I'm going to start by creating a pipeline for the investment process. To do this, follow the 3 steps mentioned in the screenshot below (Settings > Transactions > Pipelines > Create a pipeline):
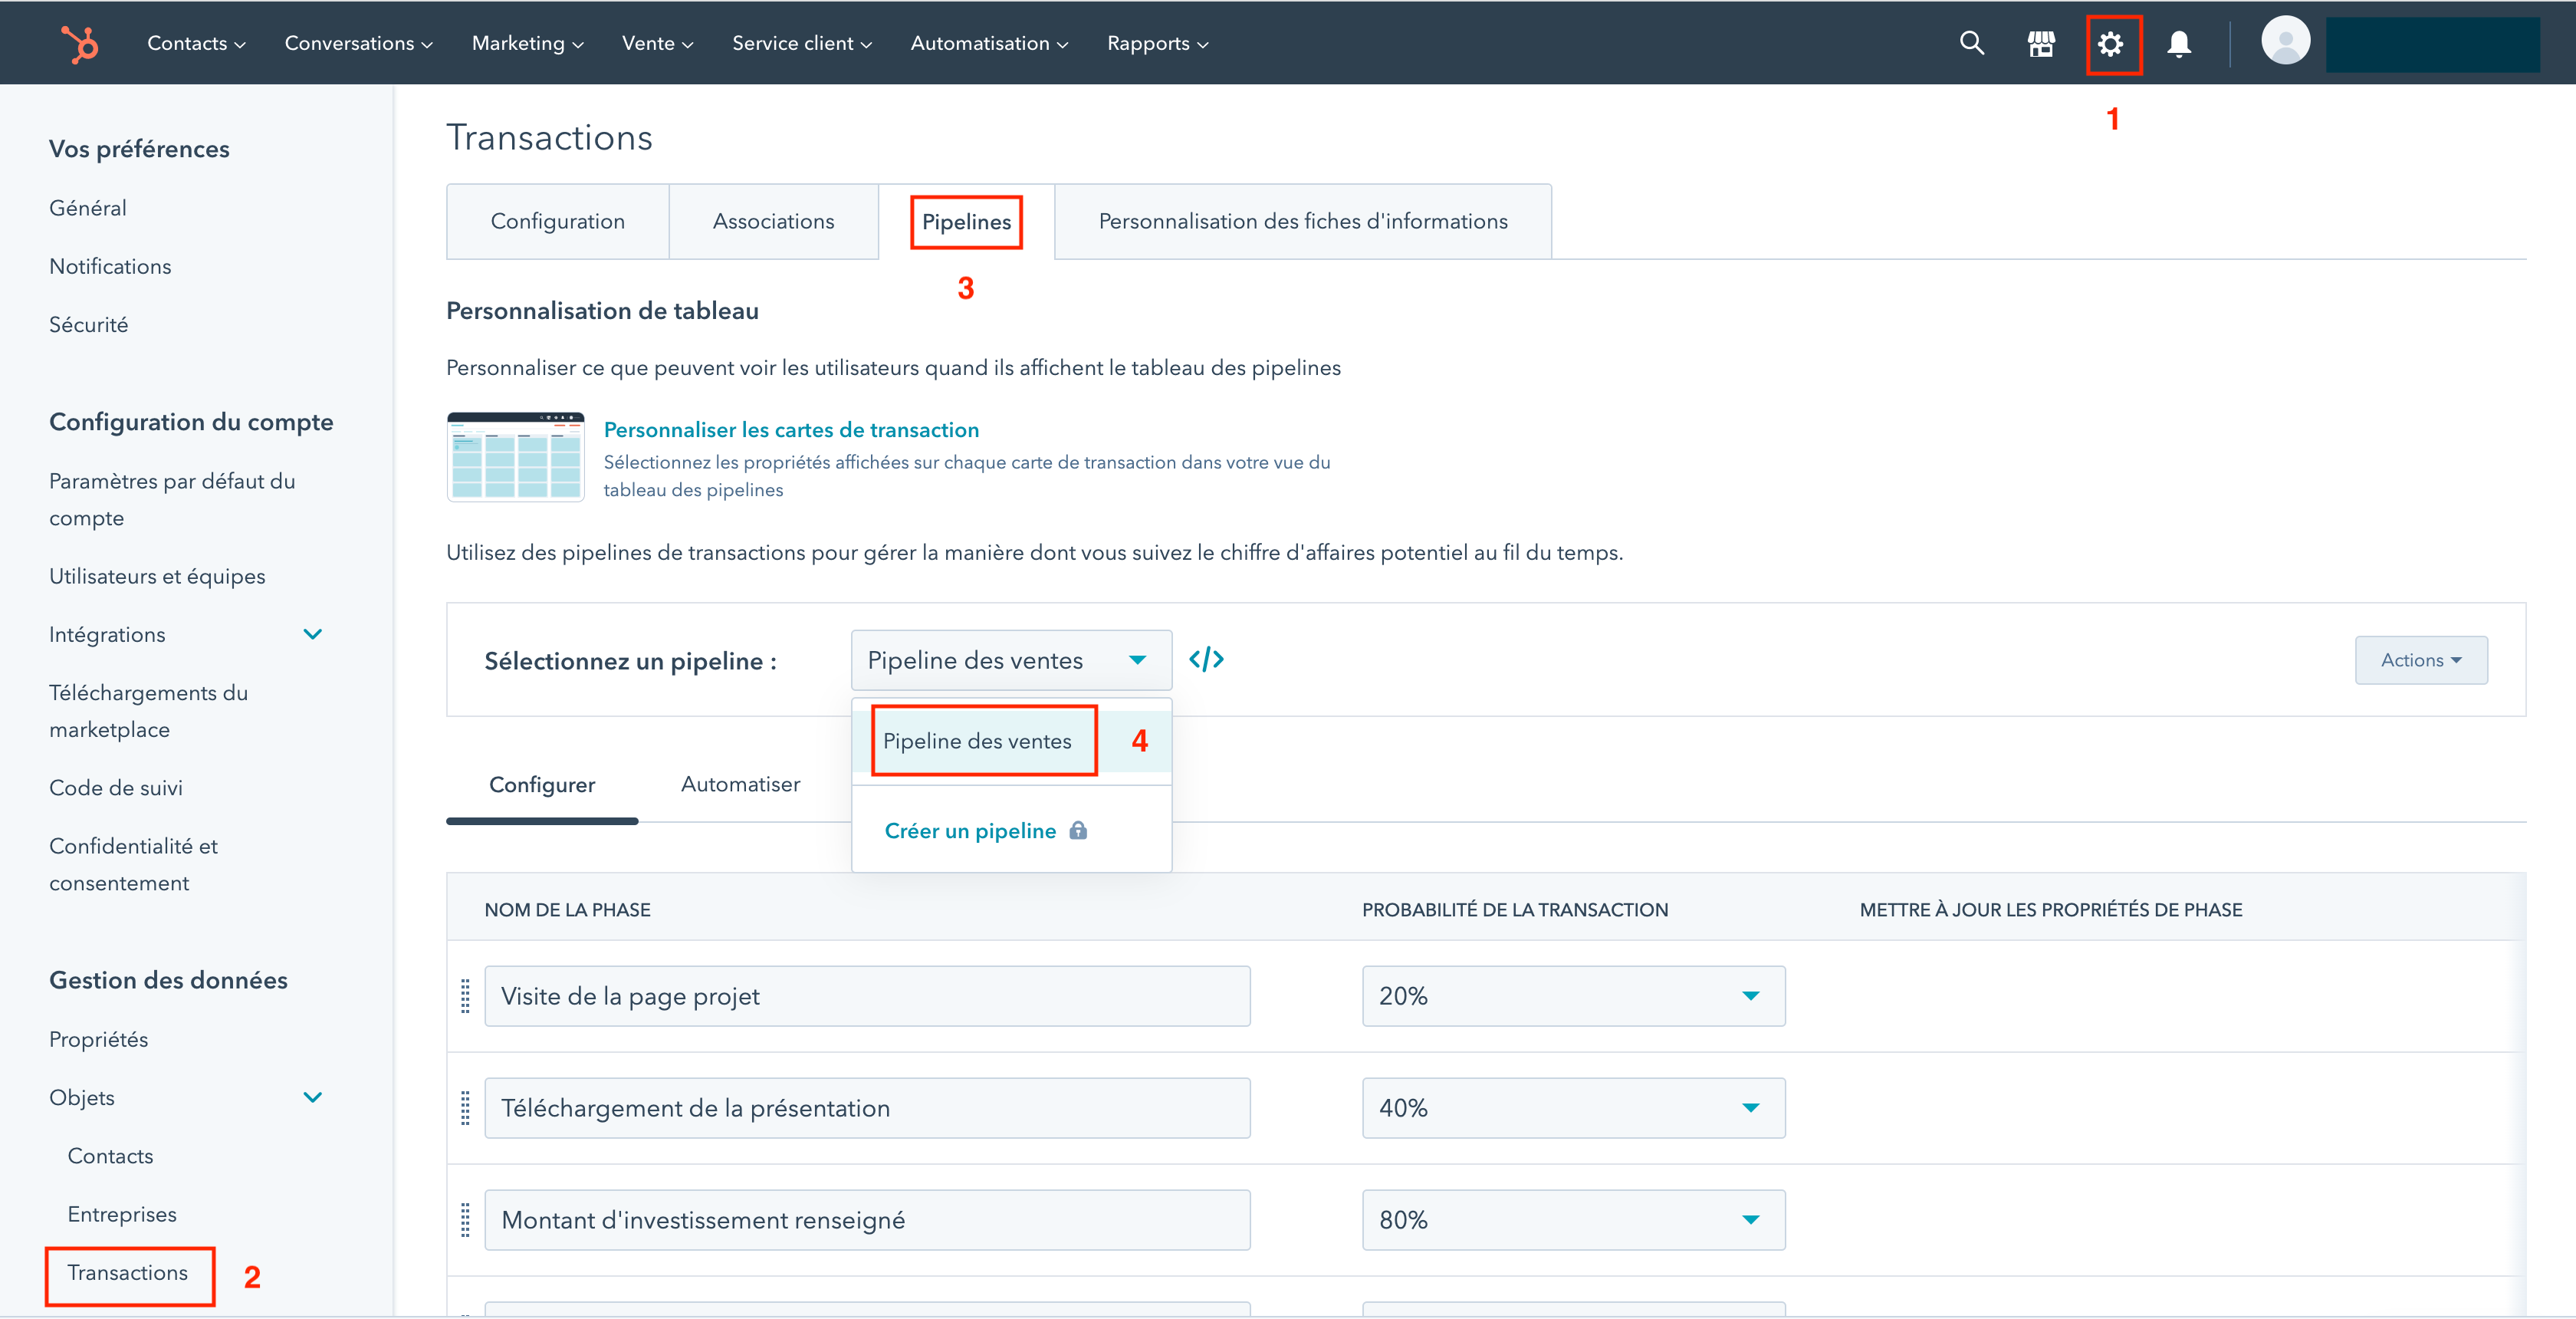
Below is the legend:
- Go to settings
- Select the “Transactions” tab
- Select the “Pipelines” tab
- Select a pipeline or create one.
You can then define the different phases of your pipeline and define the probability that the transaction will succeed:
Based on our example, here are the phases I created:
- Visit the project page
- Download the presentation
- Investment amount entered
- Investment contract signed (transaction won)
- Closed lost
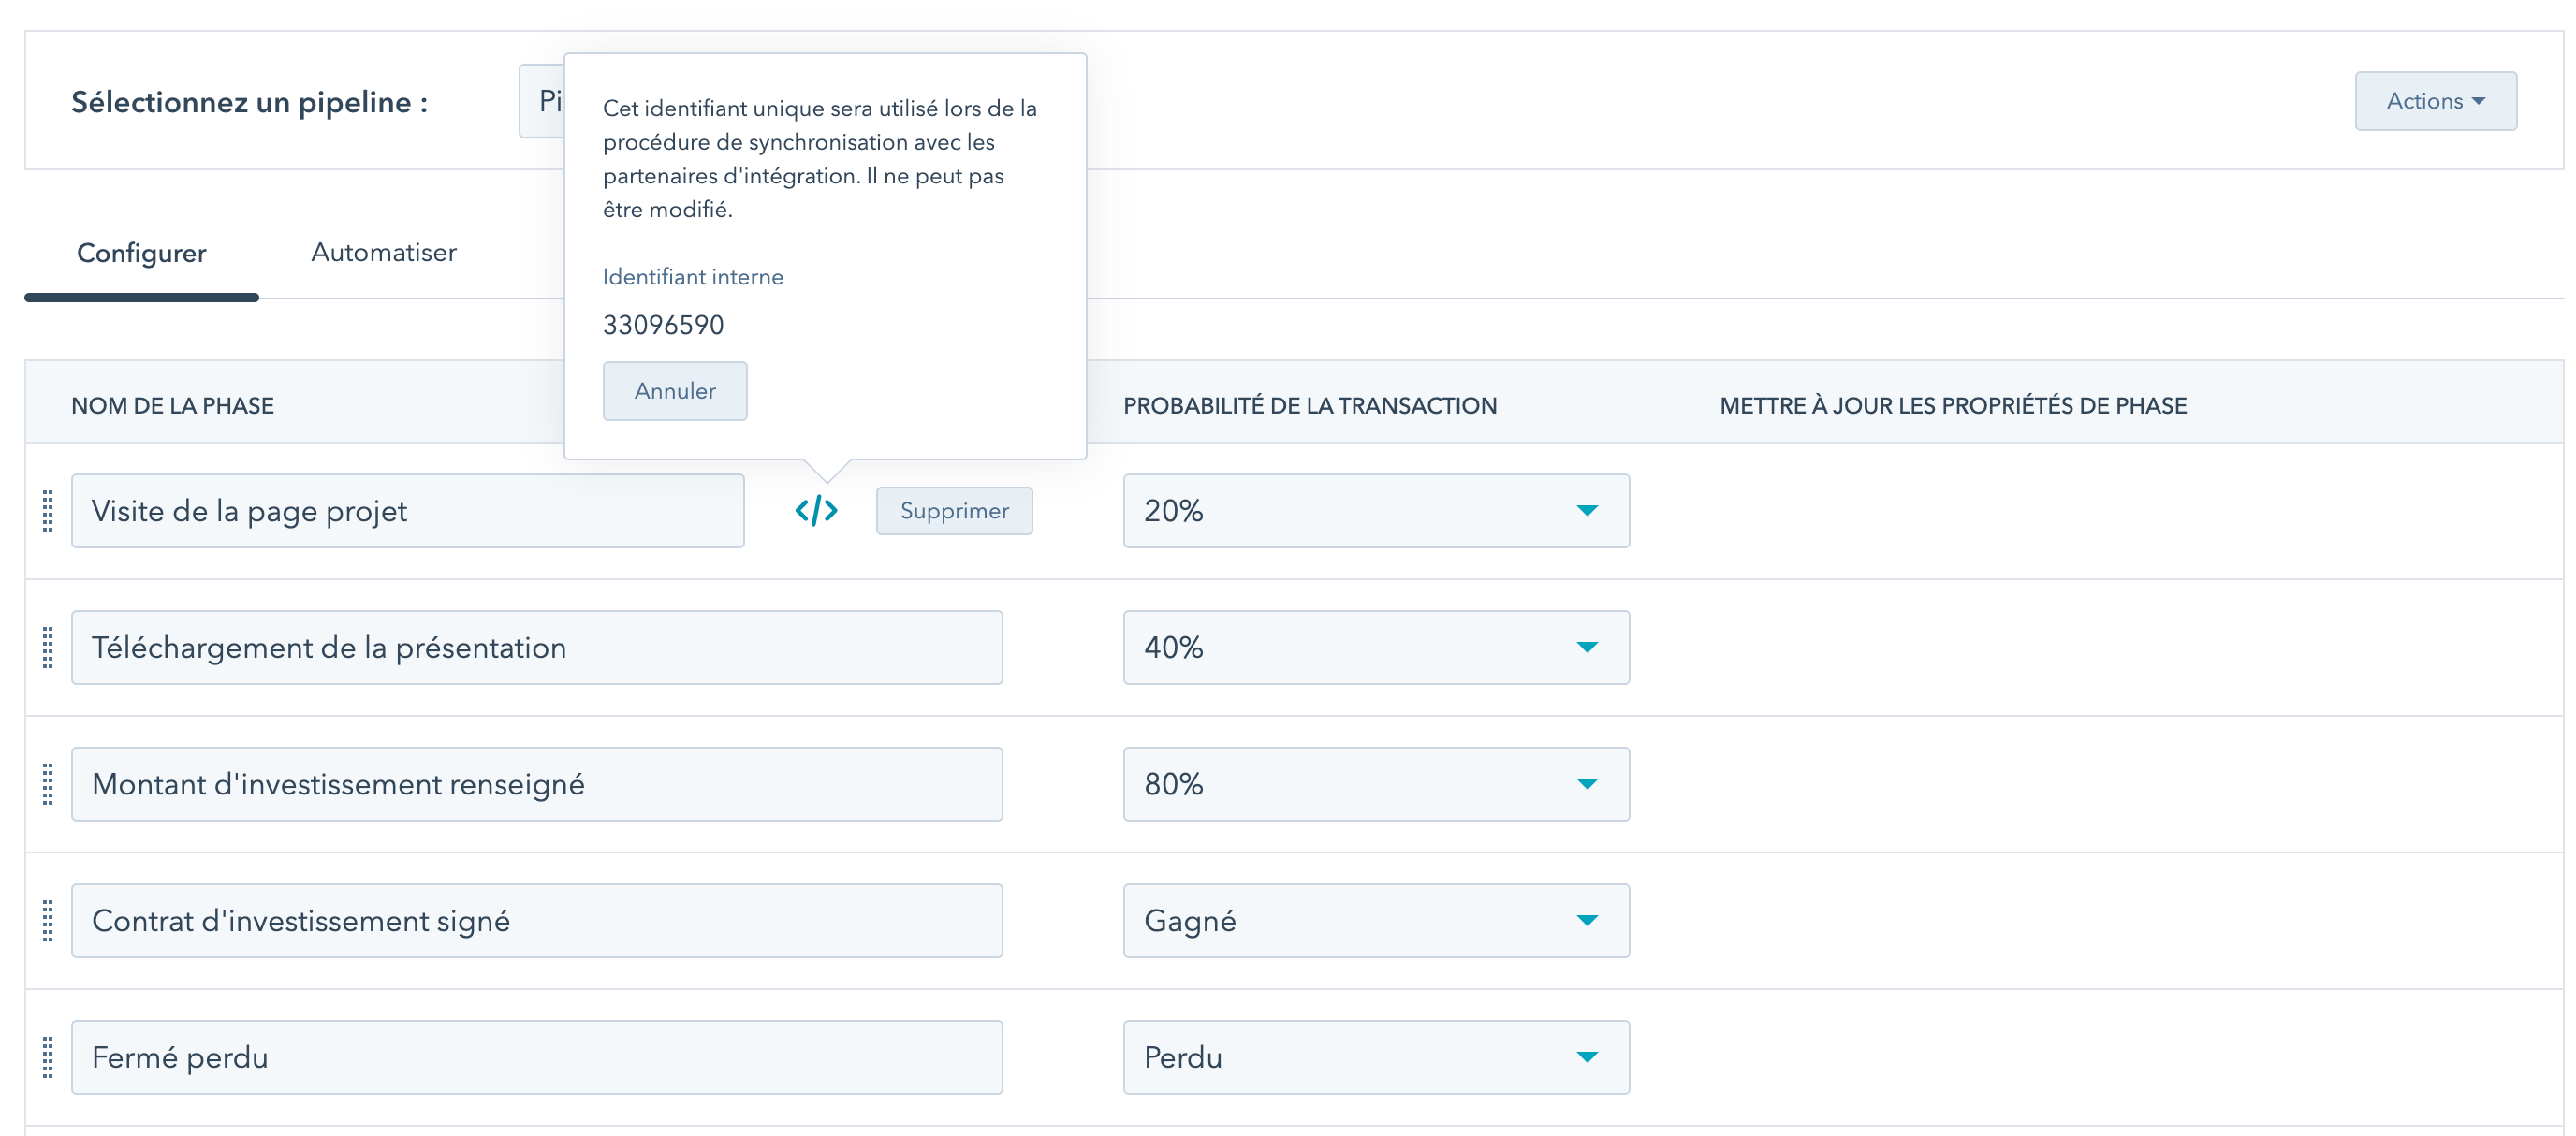
As you can see, each phase has an internal ID. This internal number will allow precise interaction between the platform and Hubspot via the Hubspot API.
Thanks to these different phases, we will be able to know with precision What is the status of the users in the investment process and In which phase there is the most loss.
To visualize your transactions, you will have to go to the transaction dashboard by clicking on the “Sales” tab then go to “Transactions” and finally select the pipeline that interests us.
Below is the legend:
- Selecting the pipeline to be displayed
- The different phases that make up the pipeline
- A transaction belonging to the “Sales Pipeline” pipeline and to the “Investment amount entered” phase
- Clicking on this icon changes how transactions are displayed to show them as columns as shown in the screenshot.
As you can see at the bottom of the screenshot above, Hubspot automatically calculates the estimated revenue by applying a weight to the transactions in the pipeline based on the probabilities associated with the phases. Indeed, the more advanced a transaction is in the overall process, the more likely it is that it will be won.
In this way you can Project your turnover in the short and medium term but also Relaunch users or change your processes to reduce the friction you can easily spot on your dashboard.
Hubspot transactions: an indisputable asset!
This tool is an indisputable asset for a company with a web platform that would like to seriously understand the activity of its users and perfect its processes to maximize its sales (or investments in our example).
In a future article, I will show you how to automatically manage your transactions using workflows.